Setting up an Arcana
Warning
This service is currently in beta phase and is updated regularly. The same applies to the documentation.
Table of contents:
The process screenshots contain blank blocks. These are in the positions that will be replaced with the username.
First Login
Go to the main Arcana page and click on register. You will need to log in with your Academic Cloud account first.
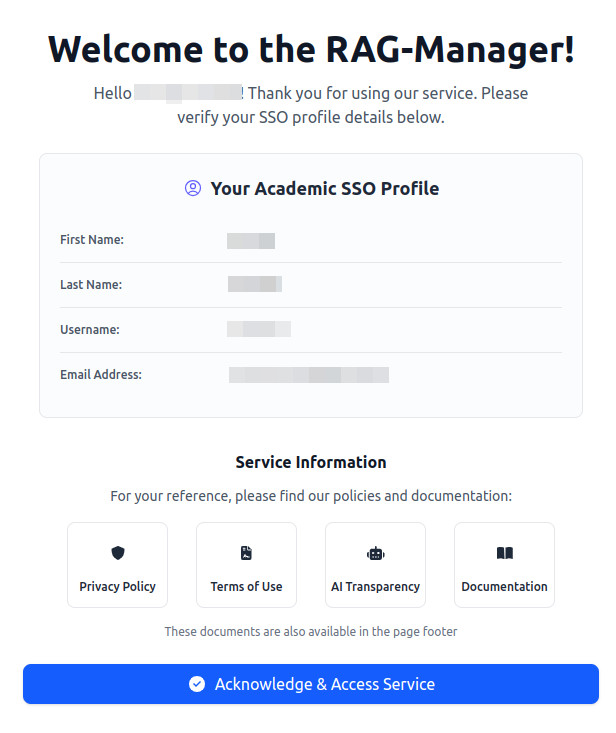
The register page of the RAG Manager welcomes the user, shows the Academiccloud profile and shows a button for registering to the service by acknowledging the details.
Once this is done, you are now able to go to the dashboard which looks like this:
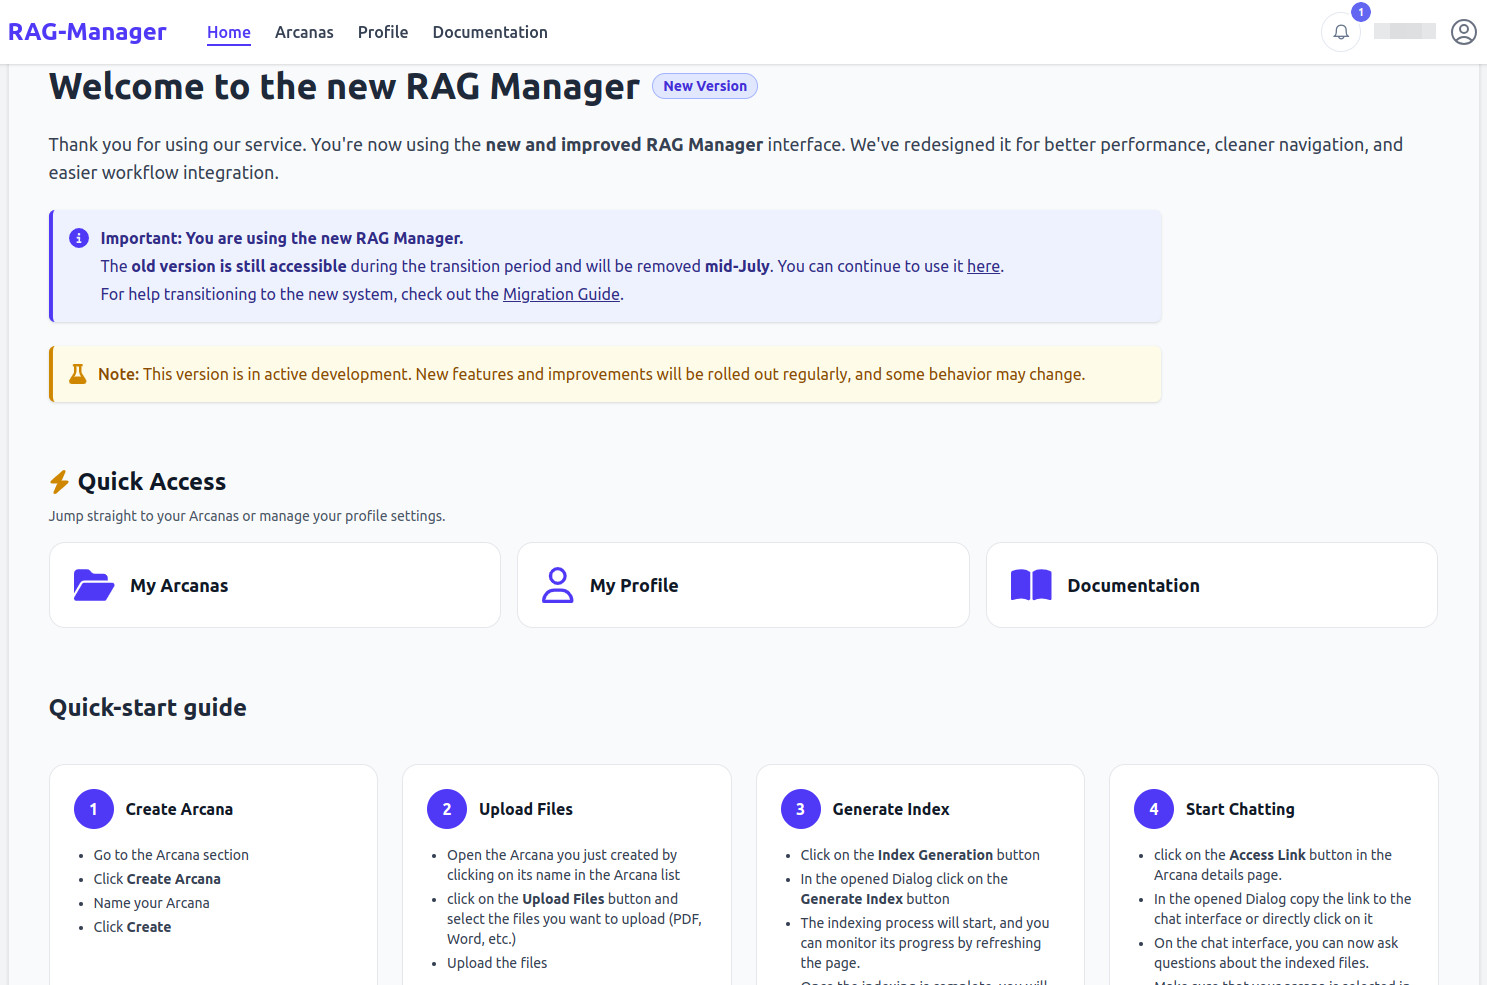
The Arcana manager dashboard has a main part and a menu bar. The menu bar contains the Home tab, Arcanas tab, a Profile tab and a Documentation tab. The main part contains a 'Quick Access' section and the 'Quick Start' guide. The bottom of the page has links to the Data privacy and terms of use.
You can find an overview of your profile under the profile tab. This is also the place, where you can delete your profile data.
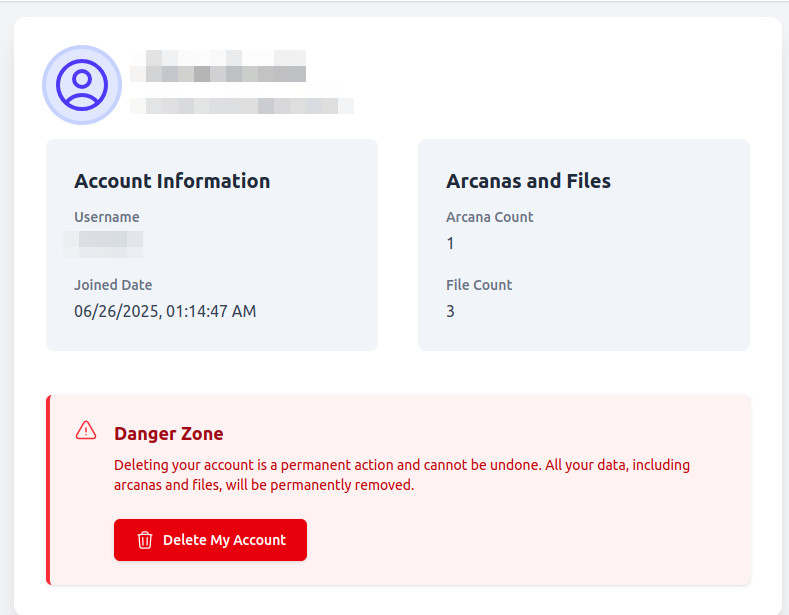
The user profile tab shows the account information and a red box that reads danger zone and contains a button to delete the account.
Creating an Arcana
Once you have the dashboard open, you can navigate to the Arcanas section by either clicking on it in the navigation bar at the top or clicking on the “My Arcanas Box”. On the Arcanas section clicking on “+ Add New Arcana” will open the Create Popup. First, you need to specify a name for this arcana.
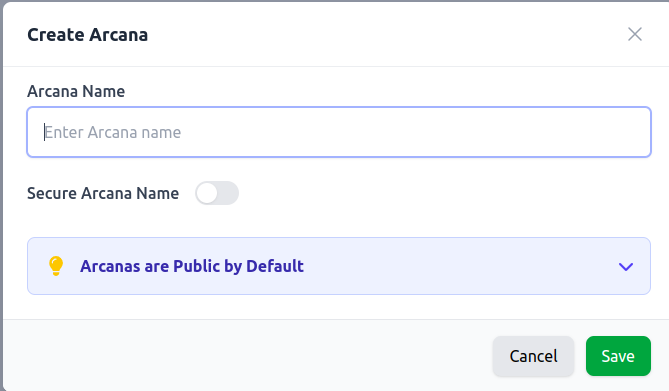
The main Arcana manager, once pressed on the new Arcana button, displays a window in which a name can be set and a new Arcana created.
Enabling the “Secure Arcana Name” slider will append a random string to the Arcana’s name. This ensures that only users who know the exact name of the Arcana can chat with it.
Note: All of your Arcanas are public by default! This means that anyone who knows the exact Arcana name can chat with it. However, this does not mean that they can directly access your files.
Once created, it should appear in your Arcana list.

The Arcana manager now contains a new Arcana which is not indexed and has no files. The actions section contains a button for open folder, delete, and access link.
By clicking on an Arcana, you can open the view of that Arcana content.

The menu for this new Arcana has four buttons up top: upload a new file, access link, index generation, and delete Arcana. The table below does currently not contain any files.
Uploading Files
On the Arcana page click on “Upload Files” to start adding your files to the arcana
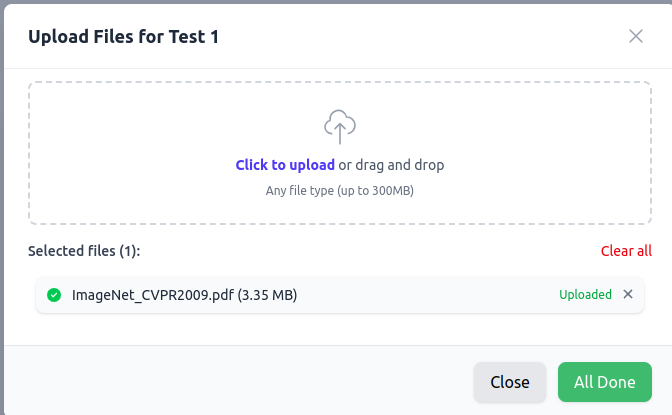
The upload a new file window has a button for choosing a file, as well as a cancel and done button.
Select one or multiple files to upload. You can upload files of various types. The following file formats are supported:
- Text (.txt)
- Markdown (.md)
- Word (.docx, .dotx, .docm, .dotm)
- Powerpoint(.pptx, .potx, .ppsx, .pptm, .potm, .ppsm)
- PDF (.pdf)
- HTML (.html, .htm, .xhtml)
Once uploaded, your files should appear.

Once uploaded, the menu for this Arcana now shows the file, which is not indexed and not converted.
You can check the file details by clicking on the “File Info” icon next to each file.
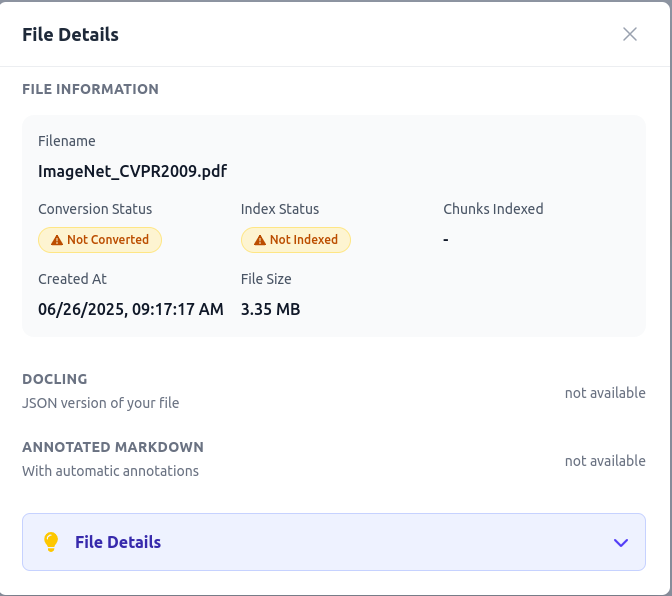
The File Details menu shows the file information as well as the status. Additionally, it gives the option to download the processed Markdown Plus file as well as a JSON file. Also, a new Markdown Plus file can be uploaded.
This is also the page, where after generating the index you can download the Docling JSON file or download the annotated Markdown file. Also, you have the option to upload a new version of the file. More importantly, you can download the Markdown file and update the markers mentioned in the Docling process. This is very useful to fine tune the splitting and marking of the file for better indexing and retrieval. Once these changes are made, uploading it will start a check process to make sure the content still matches the uploaded material.
Now that the file or files are uploaded, you can start the index generation and file conversion by clicking on “Index Generation”.
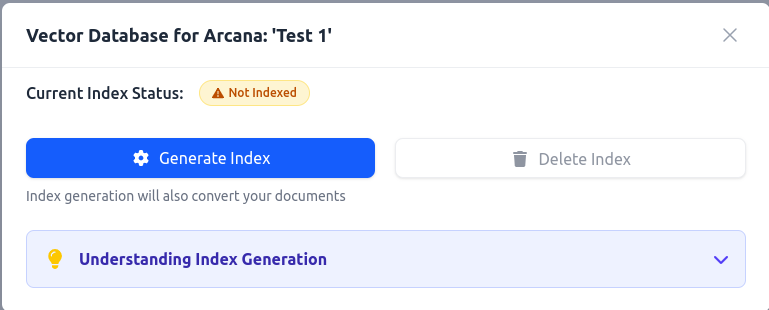
Clicking on "Generate Index" opens a new small window prompting the user to confirm that the index should be generated.
Which will change the status to a blue “pending” and finally a green “indexed”.

The index status has changed from not indexed to pending.

The index status has changed to Indexed.
Viewing your Access Link
Once your Arcana is indexed, you will be able to generate the Access Link and get the ID for this Arcana. Click on “Access Link” in the Actions tab of the respective Arcanas to generate it.
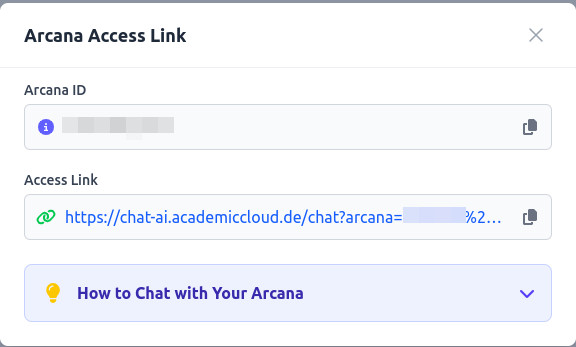
Once the access link is created, it shows the link, which can be copied, as well as the Arcana ID.
You can click on the link or copy it into a new tab, which will open Chat AI with the Arcana ID preset into the advanced options.
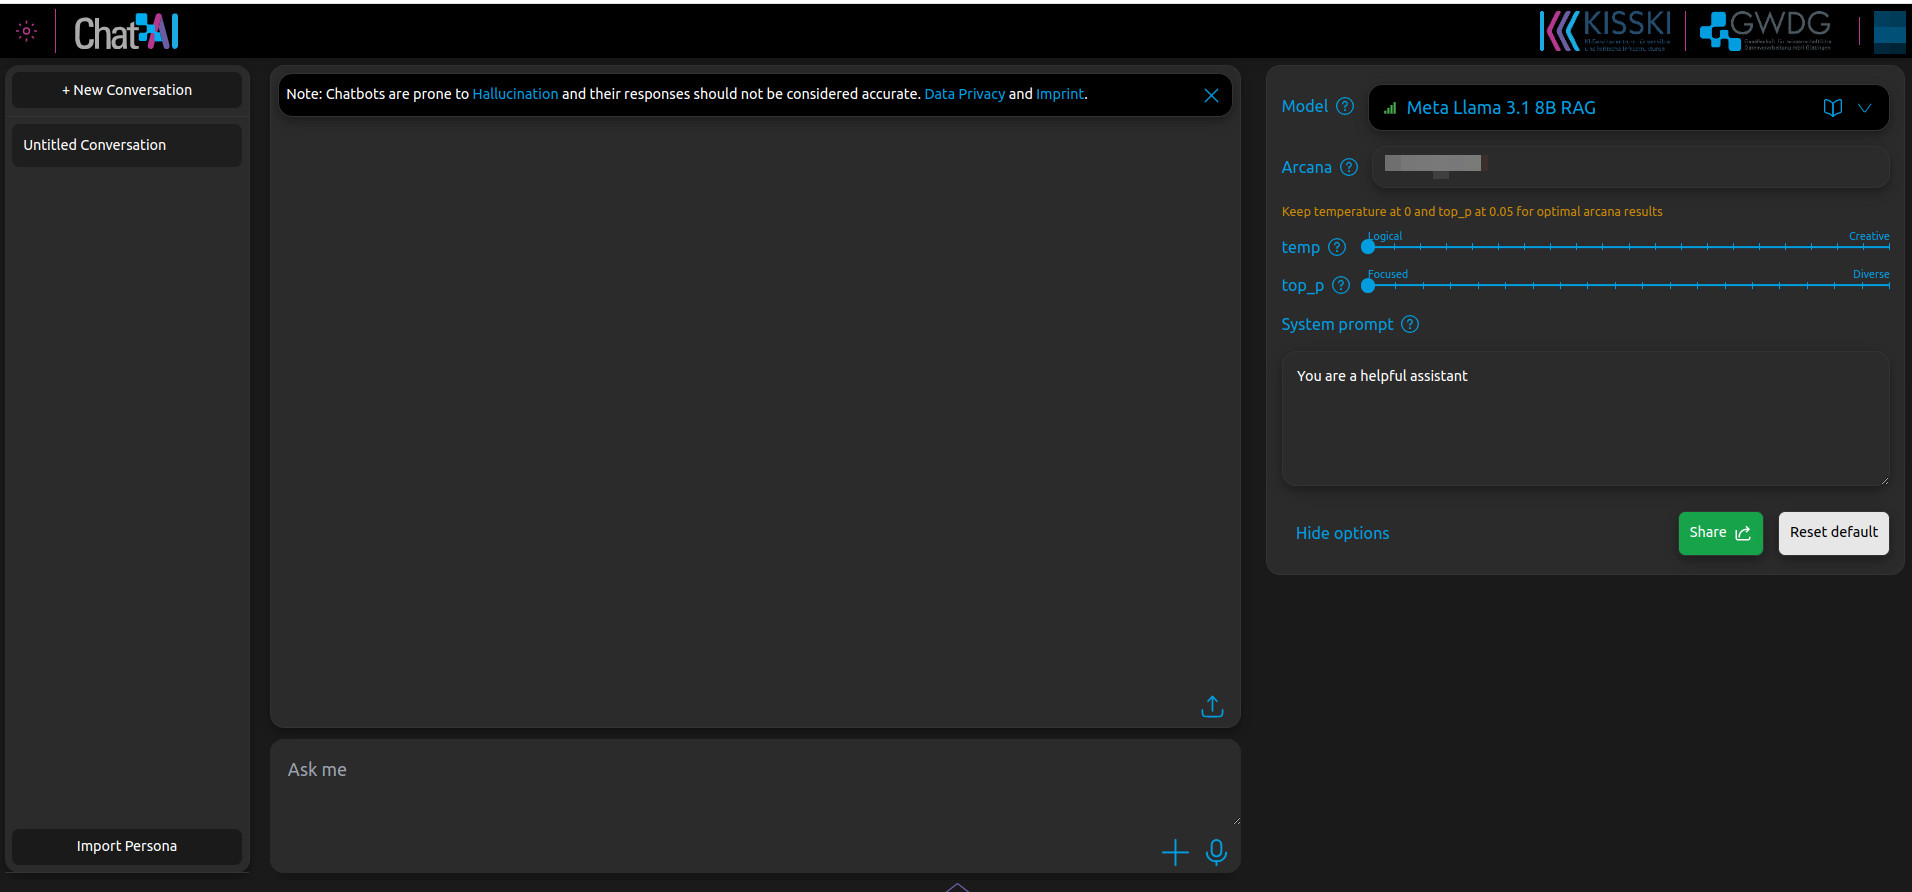
The Chat-AI window has Arcana ID filled in.
Now you are able to share the link as well as the IDs for this Arcana.
Updating files in an Arcana
There is an option to download and customize annotations for uploaded files, or modify previous manual or generated annotations. After the file has been uploaded and processed, you can update its annotation if necessary.
The details dialog for a PDF looks like this:
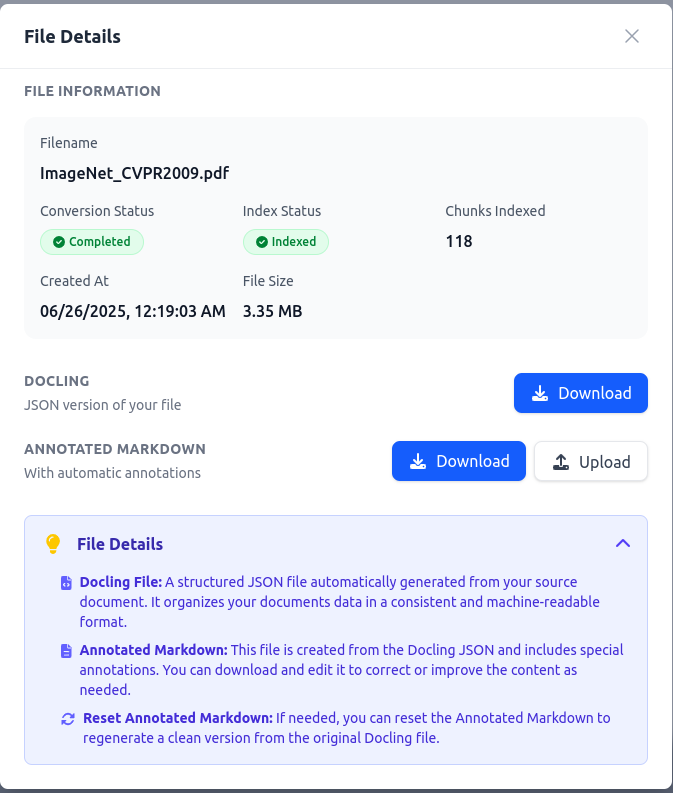
The File Details dialog for a PDF file lists information about the file as well as the index and conversion status. Below is the option to download the JSON output of the Docling process. At the bottom is the option to download the annotated Markdown file, upload an updated file, and an option to reset the annotated Markdown file.
For all file types, there is the option to download the annotated Text/Markdown file. In case of a PDF, this annotated Markdown file - also called Markdown Plus - is automatically generated by the Docling process. There is also the option to upload a manual annotated file (text or markdown). This is very useful to manually set the annotations or to update them. Additionally, many files have a JSON file from the Docling process that can be downloaded and viewed.
The available annotations are explained in the Docling process under the heading Markdown Plus Annotations.
Info
Partially annotated files do not work. They either have to be fully annotated and not annotated at all.