User Perspective
HPC Project Portal
The HPC Project Portal can be used to:
- See all projects one is a member of, and very importantly, get the following information:
- Your project-specific username for each project (it is also sent via the portal’s notification email when being added to a project).
- The HPC Project ID of the project:
- Which is the directory name of the project’s directories in the data stores.
- The name of the project’s POSIX group will either be this value prefixed by
HPC_or the value itself if the former does not exist.
- The project path, which is where the project sits in the project tree. The project’s Project Map is at
/projects/PROJECTPATH(you can also use the symlink~/.projectin your HOME directory to get this).
Login, Logout, Change SSH Key
The front page of the HPC Project Portal where you login is shown below.

HPC Project Portal Front Page
Login/front page of the HPC Project Portal.
If you click the icon of a person’s head and shoulders in the top right of the page, you get a menu where you can logout as well as a convenience link to the Academic Cloud security page where you can manage your SSH keys (see Uploading SSH Keys for more information). The menu is shown in the screenshot below.

Logout and SSH Key Management Menu
Menu providing logout and the SSH key management link.
Browsing Projects
When you first log in, you are brought to the page for browsing active projects that you are in, which is shown below.
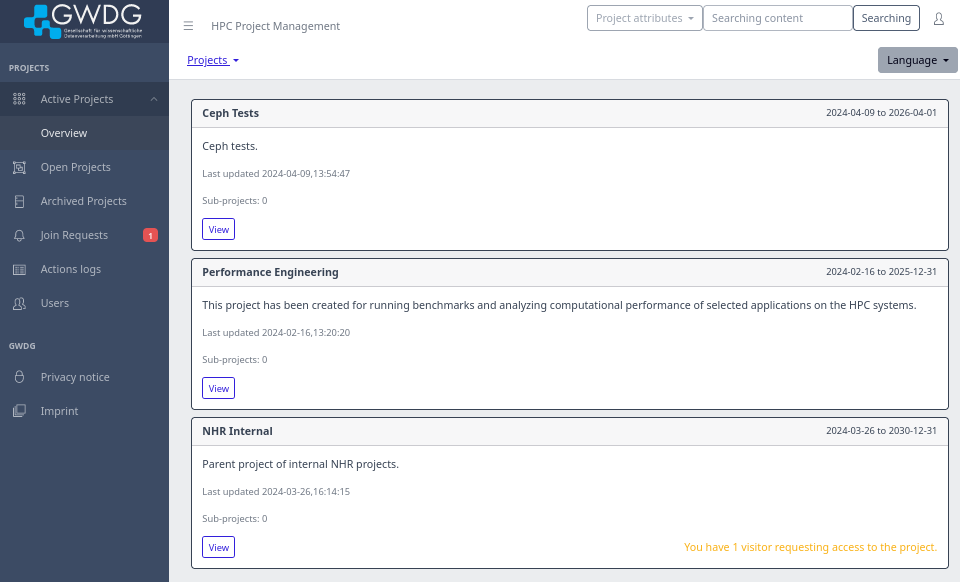
Browsing Active Projects Page
Page for browsing active projects the user is in.
There are three different pages for browsing projects, which can be accessed from the nav-bar on the left.
- Active projects you are in is under Active Projects -> Overview.
- Open projects (publicly viewable projects that anyone can request to join) is under Open Projects.
- Projects which have expired or otherwise been deactivated are under Archived Projects, which is shown in the screenshot below.
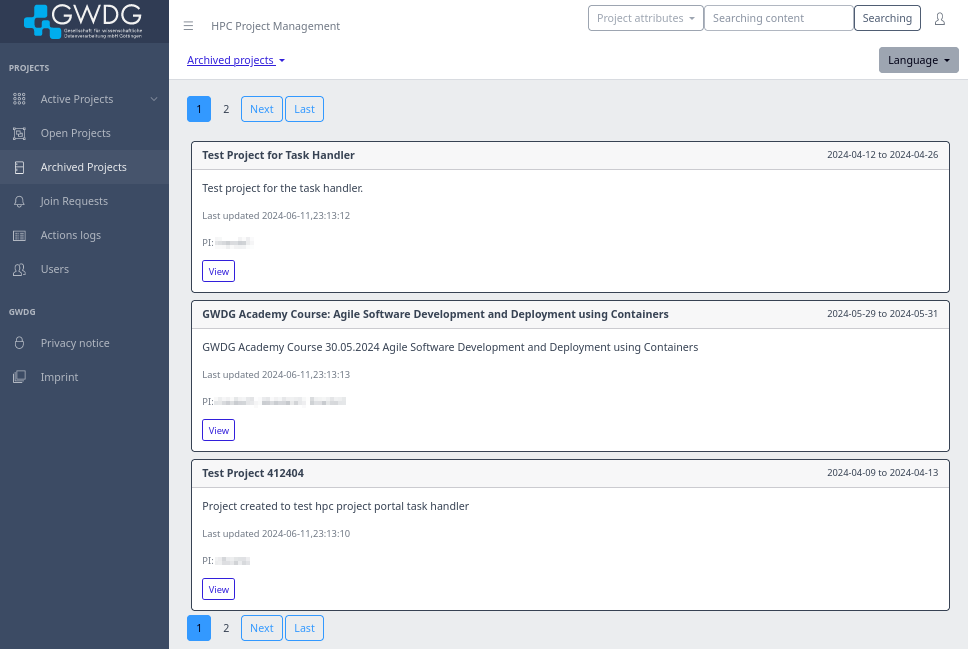
Browsing Archived Projects Page
Page for browsing inactive (archived) projects the user is in.
On all browsing pages, the projects are shown as a list of boxes with the following elements:
- Project name in the top left
- Project start and end dates are in the top right
- Project description below the project name
- When the project was last updated/changed below the project description
- For active projects, the number of subprojects below when the project was last updated
- For archived/inactive projects, the Academic Cloud ID names of the project PI/s below indicate when the project was last updated
- The View button at the bottom left to go to the project view page
- For active projects where you have the PI or Delegate role, if there are any pending join requests, this is shown at the bottom right.
See the zoomed in view of one project in the browsing list below.

Zoom In on One Project While Browsing Active Projects Page
Zoom in on one project in the project list when browsing active projects.
Viewing a Project
Clicking a project’s View button when browsing projects brings up the project’s page, which is shown below for the case where the user is part of the project with the role of Member.
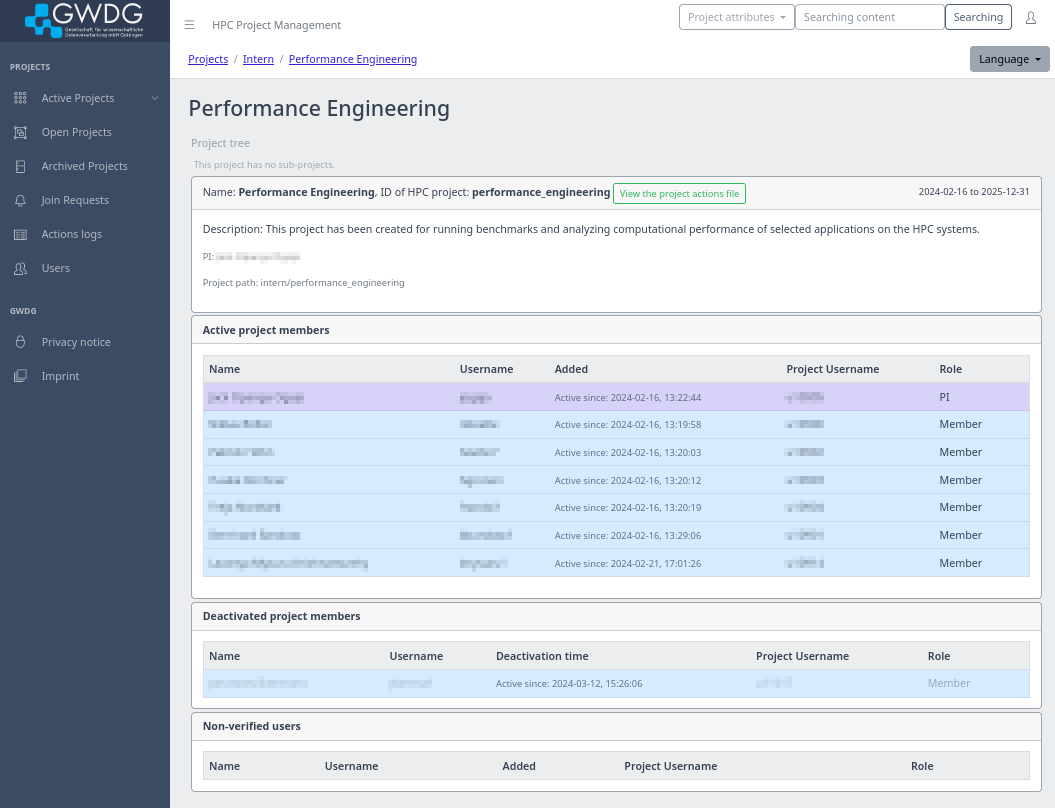
Project Page
Project page for a project the user is a member of. Names, usernames, and email addresses are blurred.
The project is shown in several boxes. If the project has sub-projects, the first box will be a list of the subprojects. Then, the next box is much like what is shown when browsing projects and includes the following information
- In the top row
- Project name
- HPC Project ID
- “View the project actions file” button to see the history of the actions taken on the project
- Project start and end dates
- In the rest of the box from top to bottom:
- Project description
- Names of the PI/s
- Project path (where it is in the project tree, see Project Structure for more information)
- The Join button if it is an open project you aren’t a part of yet, which lets you make a request to join the project
- Additional management buttons if you have the Delegate or PI role (see Management Interface for more information)
A box of the active users/members of the project. They are presented as a table with each user’s name, Academic Cloud username, when they were added to the project, their project-specific username, and their role. If you have the PI or Delegate role, you will also see an icon for the user management menu on the right side of each user’s row (see Management Interface for more information).
A box of the project’s deactivated users. They are presented as a table of each user’s name, Academic Cloud username, when they were deactivated, their project-specific username, and their role. If you have the PI or Delegate role, you will also see an icon for the user management menu on the right side of each user’s row (see Management Interface for more information).
The last box shows the visitors who have requested to join the project in a table. If you have the PI or Delegate role, you will also see an icon for the user management menu on the right side of each user’s row (see Management Interface for more information).
Requesting to Join a Project
You can request to join a project by
- Using the join link given to you by a PI or Delegate of the project
- Clicking the Join button on an open project you aren’t a member of yet (only for administrators)
Using either, you are taken to the join request page, which is shown in the screenshot below. You should enter information in the provided text box telling the project PI/s and/or Delegate/s important context for your joining (e.g. for an open project, this could include indicating more about who you are and why you want to join), and then click Yes or Cancel.
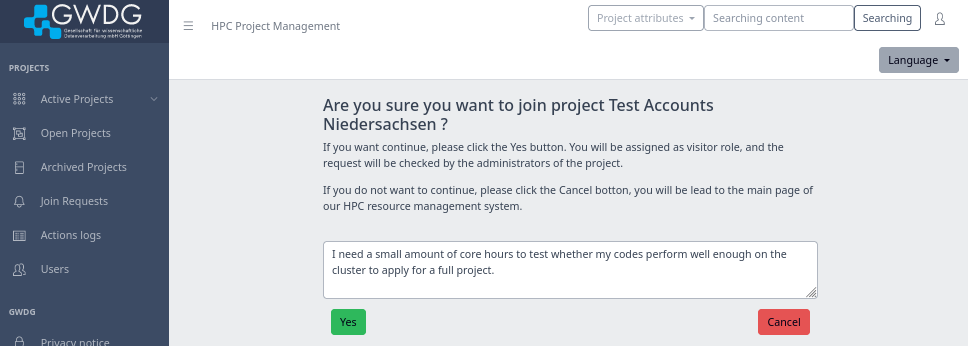
Making a Join Request
Page for making a join request for a project.
Unsubscribing from the HPC News Mailing Lists
There are multiple mailing lists that you get subscribed to when you are getting HPC access. The hpc-anncounce-* email lists contain import system information and maintenance information. They are important to all users and unsubscribing from these lists is only possible if your account is deactivated for HPC.
In addition to these technical information lists there are HPC-news-* mailing lists. These lists contain information about new trainings and courses. If you do not wish to receive this information you can unsubscribe when you login to the HPC Project Portal. Click on the user icon in the top right corner and click on “Account” from the dropdown:

Open User Account Settings
Access the user account page
On the settings page you can disable the slider “Recieve HPC news Emails”.
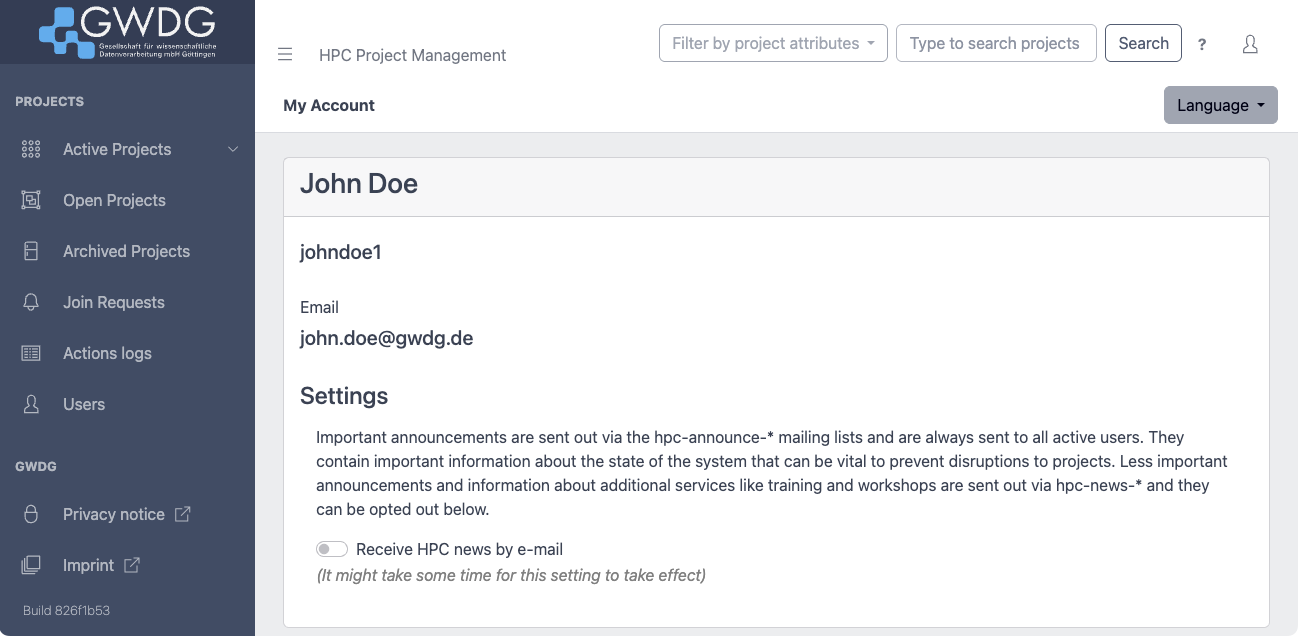
User Account Settings Page
Settings page with mailing list opt out switch